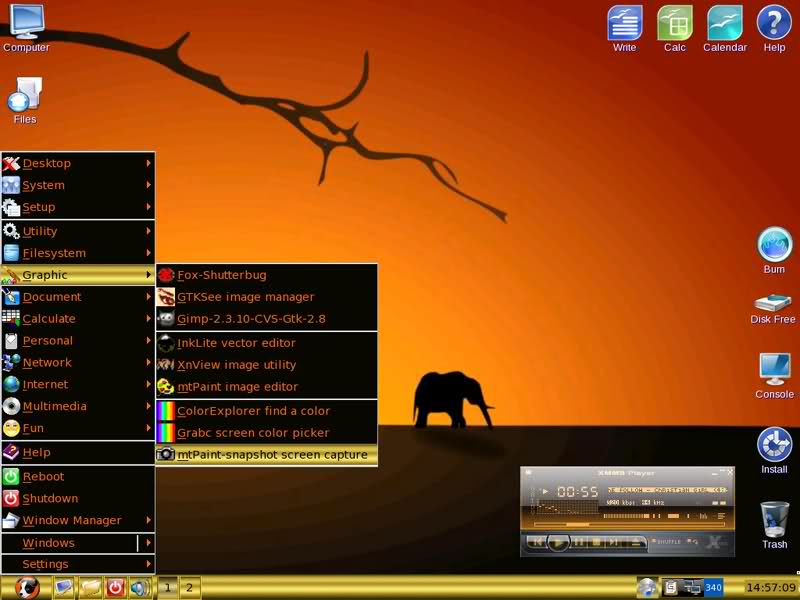
PuppyLinux : EZpup – EZpup adalah pemutakhiran kegunaan satu langkah yang dimaksudkan agar mudah … sangat EZ … dan itu berlaku untuk menginstal dan menghapus juga. Ini menginstal Window Manager (IceWM) baru, versi terbaru dari ROX-Filer (2.6.1), dan beberapa utilitas praktis untuk mengelola tema dan instalasi perangkat lunak.
EZpup adalah pembaruan kegunaan satu langkah yang dimaksudkan untuk menjadi EZ … sangat EZ … tetapi itu berlaku untuk menginstal dan menghapus. Ini menginstal Window Manager (IceWM) baru, versi terbaru dari ROX-Filer (2.6.1), dan beberapa utilitas praktis untuk mengelola tema dan instalasi perangkat lunak.
Semudah menginstal dan menghapus, ada beberapa hal yang mungkin ingin Anda ketahui tentang cara mengkonfigurasi dan memodifikasi komponen EZpup untuk pengalaman Puppy yang lebih memuaskan. Halaman wiki ini adalah upaya untuk memberikan Tips dan Trik penting yang akan membantu pengguna untuk menyesuaikan EZpup dengan selera mereka sendiri.
Apa yang ada di EZpup-2? Icewm 1.2.30 – lihat manual IceWM∞ untuk referensi perintah yang komprehensif Rox Filer 2.6.1 – lihat manual ROX-Filer∞ untuk referensi perintah yang komprehensif Manajer Konfigurasi Icewin oleh Tronkel Mouse X11-Cursor changer MU dan tema yang dipilih – defaultnya adalah Aero MU-Gtk-Themechooser dan tema yang dipilih – default adalah Aero Penginstal Perangkat Lunak Anak Anjing (PSI) MU∞ Pusat kendali tampilan dan nuansa 3DCC MU Tema IceWM yang dipilih oleh WhoDo dan beberapa lainnya Ikon baru dan tipe pantomim untuk mencocokkan tema Gambar latar belakang baru yang sesuai dengan tema File winoptions yang diperbarui untuk lebih banyak ikon bilah tugas Monitor aktivitas jaringan Blinky – ditambal untuk IceWM oleh MU Template menu XDG yang diperbarui untuk IceWM oleh WhoDo Opsi kegunaan yang diperbarui untuk Rox dan IceWM…
Puppy Multisession Live-DVD (and CD) – Apakah Anda menjalankan Internet Cafe? Bayangkan tidak pernah harus memelihara PC, lagi. Bayangkan PC murah tanpa hard drive, tanpa sistem operasi. Bayangkan tidak ada lagi virus, tidak ada masalah keamanan sama sekali …apakah saya sedang bermimpi?
Berikan setiap pelanggan Anda DVD live Puppy, mereka memasukkannya saat boot, Anda telah mengkonfigurasinya untuk terhubung ke server DHCP Anda, dan hanya itu. Mereka dapat melakukan apa pun yang mereka inginkan, semuanya disimpan ke DVD pribadi mereka — atau mini-DVD 2G ukuran saku baju. Apakah Anda ingin menggunakan PC di tempat kerja dan tidak meninggalkan jejak? Boot DVD langsung, hard drive tidak akan disentuh. Ambil semua file pribadi Anda antara kantor dan rumah. Simpan jejak audit pribadi penuh. Oke, saya dapat memikirkan lebih banyak alasan mengapa DVD live multisesi Puppy adalah ide yang bagus, tapi mari kita mulai halaman ini dengan memperkenalkan konsep… Ini adalah yang pertama di dunia (atau lebih tepatnya, “dunia kedua”, karena orang-orang dari proyek Morphix memberi tahu saya bahwa mereka telah mengembangkan sesuatu yang serupa! Pemahaman saya adalah bahwa sistem multisesi Puppy sejauh ini adalah yang paling canggih – – jadi, ini adalah yang pertama di dunia untuk tingkat kecanggihan dan kegunaan praktis ini). Live-CD telah menjadi populer, tetapi tidak ada yang menyimpan data dan pengaturan pribadi Anda kembali ke CD. Kebanyakan dari mereka tidak bisa, karena terlalu besar, setidaknya untuk sebuah CD. Karena Puppy hanya sekitar 39M – 60M, ada sekitar 600M ruang kosong di CD, jadi mengapa tidak menggunakannya? Dan kemudian ada DVD… melalui penyimpanan 4G pada DVD single-layer. Faktanya, kami telah menemukan bahwa DVD lebih unggul daripada CD dalam hal lain: sesi yang disimpan tidak mengalami sekitar 12M ruang terbuang di setiap sesi CD yang disimpan, dan pembakaran sesi tambahan DVD lebih halus …artinya, ini hanya berfungsi lebih baik. Jadi, sisa halaman ini akan fokus pada DVD, tetapi Anda masih dapat menggunakan CD jika diinginkan. Untuk memulai dengan DVD live multi-sesi Puppy cukup mudah. Tidak ada yang rumit untuk dilakukan untuk mengaturnya, itu hanya berfungsi. Setelah Anda mengunduh file ISO DVD live, satu-satunya kesulitan kecil adalah Anda perlu menggunakan perangkat lunak yang tepat untuk membakarnya ke DVD — langkah-langkah penginstalan terperinci diberikan di bagian bawah halaman ini. Jadi, bagaimana cara kerjanya? Yang harus Anda lakukan adalah mem-boot PC dengan DVD multi-sesi yang dimasukkan ke dalam drive DVD-burner — dengan demikian, Puppy secara otomatis mengetahui drive mana yang merupakan DVD-burner, jika Anda memiliki lebih dari satu drive CD/DVD. Kemudian Anda menggunakan Puppy dengan cara biasa.
Saat shutdown, semua file baru dan yang diubah di direktori home Anda disimpan kembali ke DVD. Itu dia. Lain kali Anda boot, semua file pribadi dipulihkan. Berjalan sepenuhnya di ramdisk, DVD drive dibebaskan untuk kegunaan lain Sederhana, tapi tentu saja ada lebih dari itu. Setiap sesi disimpan sebagai “track” (well, kecuali untuk DVD+/-RW dalam mode overwrite), dan ini hemat ruang karena hanya file yang diubah yang disimpan setiap kali. Saat boot, trek dibaca dalam urutan terbalik, menyalin versi terbaru dari setiap file ke ramdisk. Ya, itu hal lain — Puppy masih berjalan sepenuhnya di ramdisk, jadi setelah boot, Anda dapat menghapus DVD langsung dan menggunakan drive untuk tujuan lain — Anda akan diminta untuk memasukkannya kembali saat dimatikan. Jadi, ketika Anda mem-boot Puppy, jika trek dibaca dalam urutan terbalik dan versi terbaru dari setiap file disalin ke direktori home Anda di ramdisk, bagaimana dengan file yang dihapus? Katakanlah Anda menghapus file selama satu sesi, yang sebelumnya telah disimpan ke DVD pada sesi terakhir, tidak akan kembali lagi saat Anda boot? Tidak, Puppy memiliki mekanisme yang melacak file yang dihapus dan ini tidak akan terjadi. Namun, hal itu menimbulkan hal yang menarik … file yang dihapus masih ada di DVD, artinya setiap file yang pernah ada akan direkam di DVD, artinya Anda memiliki jejak audit yang sempurna dari aktivitas sebelumnya. Tentu saja, DVD akan terisi pada akhirnya, lalu bagaimana? Tidak masalah, saat shutdown Puppy akan secara otomatis meminta Anda untuk memasukkan DVD kosong baru dan akan menempatkan Puppy bootable yang berfungsi penuh di dalamnya, membuat trek data pertama, dan pergilah lagi. Perhatikan bahwa “trek data pertama” akan menyimpan semua file dari sesi terakhir di dalamnya, jadi DVD baru Anda melanjutkan dengan semua file pribadi Anda dari sebelumnya. Sisa halaman ini diatur sebagai FAQ… Bisakah saya mendapatkan data dan pengaturan saya dari live-CD Puppy “normal” saya sebelumnya? Ya. Live-CD “normal” menyimpan semua data pribadi di hard drive dalam file bernama “pup001”. Pertama kali Anda mem-boot DVD langsung multi-sesi, Puppy akan menanyakan apakah Anda memiliki file pup001 dan apakah Anda ingin membaca data darinya. Jika Anda menjawab setuju, maka isi pup001 akan dibaca ke direktori home di ramdisk. Bagaimana dengan cadangan? Tentu saja DVD bisa rusak, lalu bagaimana? Anda dapat membuat salinan DVD secara berkala, tetapi Puppy memang memiliki satu mekanisme yang dapat “menyelamatkan hari” — di akhir setiap sesi, jika file /etc/pupxxxbackup ada, maka Puppy akan menyimpan sesi saat ini ke pup001 file (atau Anda dapat memberikan nama yang berbeda, lihat lebih jauh di bawah halaman ini) pada hard drive serta menyimpan
ke DVD. Catatan, Anda dapat secara manual membuat file /etc/pupxxxbackup ini sendiri, atau menghapusnya jika Anda tidak ingin hd. cadangan. Catatan, jika DVD menjadi sedikit “rapuh”, Anda dapat mentransfer ke DVD baru kapan saja, meskipun DVD saat ini belum penuh. Cukup masukkan DVD kosong baru saat dimatikan, bukan yang sekarang. Bagaimana cara meningkatkan ke versi Puppy yang lebih baru? Cara kerjanya adalah ini: Anda mengunduh file ISO terbaru, puppy-multisession-x.x.x-xxxxxx.iso, membakarnya ke DVD, lalu boot dengan DVD baru. Ketika DVD baru melakukan boot, ia akan melihat bahwa DVD tersebut baru, dan akan menanyakan apakah Anda memiliki DVD multisesi sebelumnya. Jika Anda menjawab setuju, Anda akan diminta untuk memasukkannya, dan semua data pribadi lama Anda akan dimuat ke ramdisk. Sejak saat itu, Anda menggunakan DVD baru. Sederhana, sederhana, sederhana! Namun, mekanisme peningkatan dari file “pup001” yang sudah ada sebelumnya juga dapat digunakan, seperti yang dijelaskan dalam jawaban sebelumnya di atas. Jika Anda tidak memiliki DVD multisesi sebelumnya, Anda akan ditanya apakah Anda sudah memiliki file “pupxxx” di hard drive. Itu akan ada jika Anda sebelumnya menggunakan CD live Puppy “normal”. Jika Anda menjawab setuju, maka semua data dibaca darinya, dan sejak saat itu Anda hanya memerlukan DVD multisesi. Jika semuanya berjalan di ramdisk, itu tidak banyak ruang! Betul sekali. Saya merekomendasikan PC dengan setidaknya 256M RAM. Namun, Puppy akan menggunakan partisi swap Linux jika ada di hard drive, yang akan membuat ukuran efektif ramdisk kira-kira setengah ukuran RAM + ukuran partisi swap. Misalnya, PC dengan 128M RAM dan partisi swap 400M akan memiliki ukuran ramdisk efektif sekitar 60+400 = 460M. Jika tidak ada partisi swap, maka PC 128M tidak memadai! Untuk PC dengan RAM 256M, tanpa partisi swap, ramdisknya sekitar 120M. Sekitar 60 juta dari yang diambil oleh file Puppy, kebanyakan usr_cram.fs, hanya menyisakan 60 juta gratis …tidak banyak!!! Jadi, jika ramdisk penuh, apa yang terjadi? Di akhir setiap sesi, Puppy mencoba mengarsipkan file ke DVD, sehingga file tersebut tidak akan dimuat ulang ke dalam ramdisk saat Anda boot berikutnya. Banyak file, terutama file besar, secara otomatis dipindahkan ke /root/archive/, yang merupakan folder khusus — apa pun yang ditempatkan di folder ini akan disimpan ke DVD tetapi tidak dimuat ulang pada boot berikutnya. Direktori khusus lainnya adalah “tmp”, sebenarnya, direktori mana pun yang memiliki “tmp” sebagai tiga huruf pertamanya, misalnya “tmp1” dan “tmp-z”. Isi direktori tersebut tidak disimpan ke DVD pada akhir sesi. Juga, ketika Puppy boot, dia memuat file ke ramdisk, yang terbaru terlebih dahulu, tetapi jika ramdisk hampir penuh, pemuatan berhenti. Jadi, yang Anda miliki di ramdisk adalah snapshot dari file terbaru, belum tentu semua file pribadi. Jelas, ini berpotensi kompromi. Jika banyak file tertinggal di DVD, bagaimana cara mengaksesnya? File yang dihapus, file apa pun di /root/archive/, file lama yang akan memenuhi ramdisk secara berlebihan, ketiga kategori file ini ada di DVD tetapi tidak dimuat ke ramdisk. Namun, mereka masih ada, yang sebenarnya cukup menarik — Anda dapat menggunakan Puppy multi-sesi selama bertahun-tahun dan memiliki koleksi DVD — ketika Anda memulai DVD live multi-sesi, Anda menulis tanggal mulainya di dalamnya , ketika sudah penuh, Anda menulis tanggal tutupnya — jadi Anda memiliki set DVD ini yang diatur dengan baik menurut tanggal. DVD ini adalah jalur audit lengkap dari semua aktivitas sebelumnya, sebenarnya setiap DVD dapat di-boot secara individual — sehingga Anda dapat “kembali ke masa lalu” ke konfigurasi sebelumnya. Cukup dengan mem-boot DVD sebelumnya, Anda dapat mengakses file-file di DVD itu. Atau, ketika DVD sudah penuh, jalankan melalui Gtkcat, program katalog CD/DVD — ini adalah program kecil yang hebat, dan Anda dapat memiliki database tentang apa yang ada di semua DVD sebelumnya. Saya mengunduh file musik besar. Bagaimana cara menghindari mengacaukan ramdisk? Nah, Anda bisa menyimpannya di partisi hard drive. Saat shutdown, Puppy akan secara otomatis memindahkan file “.tar.gz”, “.bz2”, “.zip”, “.tgz” dan ukuran lebih dari 99M ke folder /root/archive/, sehingga akan disimpan ke DVD dan tidak akan kembali. Anda dapat mengunduh file ke /root/archive/ sendiri, untuk efek yang sama. Cukup mudah untuk memasang DVD dan mengakses file. Jika Anda seperti saya, seorang pengunduh biasa, maka biasakan mengunduh ke /root/archive/. Cara lain untuk menghapus file besar adalah dengan menghapusnya — jika file tersebut ada di sesi sebelumnya, maka file tersebut sudah tersimpan di DVD sehingga tidak hilang. Bagaimana cara membuat partisi swap Linux? Jika Anda pernah menginstal distribusi Linux, kemungkinan itu membuat partisi swap. Jika tidak, mudah untuk membuatnya … Menjalankan Windows, menjalankan Scandisk, pengujian menyeluruh. Masih di Windows, jalankan disk defragmenter. Dari Windows atau CD boot Linux khusus, jalankan aplikasi untuk mengubah ukuran partisi… adakah yang bisa memberikan saran di sini? Apakah ada bug di multisession-Puppy? Salah satu masalah adalah keterbatasan ukuran ramdisk. Jelas, jika file lama tertinggal di DVD, tidak dimuat ke ra…
##pidorpidor##Download: puppy-unleashed-2.01.tar.gz (247M) md5sum ##pidorpidor##Or, download the ‘core’ tarball which is missing the application##pidorpidor##packages (that will have to be downloaded individually from ibiblio): ##pidorpidor##puppy-unleashed-core-2.01.tar.gz (11M) md5sum ##pidorpidor####pidorpidor## ##pidorpidor####pidorpidor####pidorpidor##
Note: Some other stuff, such as the full set of kernel modules,##pidorpidor##patched kernel source and compiler file, is at www.puppyos.com/test/##pidorpidor####pidorpidor## ##pidorpidor## ##pidorpidor####pidorpidor##
Busybox 1.01
##pidorpidor####pidorpidor##
It is intended that Busybox v1.01 will be in Puppy 1.0.7, up from 0.60.5 in all previous Puppies. ##pidorpidor####pidorpidor##
See the News page for details (17-Nov-05): http://www.pupweb.org/puppy/news.htm ##pidorpidor####pidorpidor####pidorpidor##
Get it here: busybox.gz ##pidorpidor####pidorpidor##
You can experiment by invoking the “applets” like this: ##pidorpidor####pidorpidor##
# ./busybox df ##pidorpidor####pidorpidor##
…in this example, will execute df. ##pidorpidor####pidorpidor##
KDE
##pidorpidor####pidorpidor##The file: usr_more.sfs (45M) ##pidorpidor####pidorpidor##md5sum: usr_more.sfs.txt ##pidorpidor####pidorpidor## ##pidorpidor####pidorpidor##If using a “pup001” file with various packages, be sure that all Qt and##pidorpidor##KDE packages are uninstalled, in particular the qt-3.3.4 library##pidorpidor##package. ##pidorpidor####pidorpidor##Download to same place as the “pup001” file, or to “/” for hard-drive-option-2 installations, then reboot. ##pidorpidor####pidorpidor##After rebooting, usr_more.sfs will be mounted on /usr. ##pidorpidor####pidorpidor##Using Rox, go to /usr/install-kde/, then open a terminal window, then: ##pidorpidor####pidorpidor##
# ./install-kde
##pidorpidor####pidorpidor##This will replace the files /root/Choices/ROX-Filer/globicons and##pidorpidor##PuppyPin, renaming the previous files as globicons.bak and##pidorpidor##PuppyPin.bak. The script will also kill X and restart JWM, then you##pidorpidor##will have a block of shortcuts on the desktop for evaluation purposes. ##pidorpidor####pidorpidor## ##pidorpidor####pidorpidor##The main faults: ##pidorpidor####pidorpidor##Konqueror Preferences window is empty, but you can still edit config files in /root/.kde/share/config/. ##pidorpidor####pidorpidor##Photobook view does not work in Konqueror. ##pidorpidor####pidorpidor## ##pidorpidor####pidorpidor####pidorpidor##…
Juga Tersedia dari http://puppyisos.org/isos/2008-01-to-06/∞ Catatan: Hanya gunakan mirror ini jika Anda kesulitan mengunduh dari Softpedia atau Puppylinux.ca
TEENpup Sekarang di daftar aktif Distrowatch http://distrowatch.com/table.php?distribution=teenpup∞
Butuh bantuan? Punya Pertanyaan? Mengapa tidak bergabung dengan forum Puppy Linux yang menjadi dasar TEENpup. Di sini Anda pasti akan mendapat banyak teman baru. http://www.murga-linux.com/puppy/∞
Pembaruan: TEENpup 2008 dirilis pada 3 Maret 2008 dan tersedia untuk diunduh dari Softpedia pada 5 Maret 2008. Sejak ditambahkan ke Softpedia pada 15 April 2008, TEENpup 2008 telah diunduh 5000 kali.
Sudahkah Anda mencoba TEENpup 2008! TEENpup 2008 adalah unduhan gratis.
Hidupkan kembali PC Pentium III lama yang telah Anda simpan!
TEENpup 2008 bahkan dapat berjalan pada PC lama yang kemudian terdaftar: Contoh seorang kerabat tidak dapat melihat putrinya di Facebook karena PC 350MHZ lamanya dengan Windows 98 tidak akan menginstal JAVA karena situs web JAVA mencantumkan versi Windows 98 sebagai tidak didukung. Saya membuat Live CD khusus TEENpup 2008 dengan JAVA pra-instal dan sekarang dia dapat melihat Facebook. Sekarang dia sedang membakar CD musik dengan K3B sambil tetap menjalankan Live dari CD. Dia berkomentar bahwa TEENpup 2008 dijalankan lebih cepat daripada salinan Windows 98 yang diinstal.
Lihat apa yang dipikirkan ulasan
Tahukah Anda TEENpup / Linux juga dapat menjaga Sistem Operasi Windows Anda dan membuatnya tetap berjalan lebih lama! Bagaimana? Karena TEENpup dapat dijalankan sebagai Live CD dan dilengkapi dengan sebagian besar codec/plugin yang diperlukan untuk menjelajahi Web yang telah diinstal sebelumnya. Anda dapat membuka situs web favorit Anda seperti Youtube, Facebook dll yang menjalankan TEENpup dari Drive CD/DVD Anda sementara Windows dengan senang hati tidur di dalam PC Anda tanpa pernah mengetahui bahwa itu “ON”. Ini harus mencegah orang-orang jahat di Web menginfeksi Sistem Windows Anda. Juga satu keuntungan lainnya adalah TEENpup kemungkinan besar akan siap digunakan dalam waktu yang lebih singkat daripada yang dibutuhkan untuk mem-boot Windows.
Apa itu TEENpup Linux?,Mengapa saya ingin menggunakannya melalui Windows atau Distro Linux lainnya? TEENpup adalah untuk Pengguna PC yang tidak ingin atau peduli tentang pengaturan Flash, Java, Realmedia. Sama Seperti Windows, mereka berharap semuanya berfungsi. Mereka tidak ingin pergi untuk mengatakan Youtube dan pesan “plugin yang hilang” muncul, mereka hanya berharap semuanya berfungsi. “Sementara TEENpup awalnya dibuat untuk menarik Pengguna Remaja Puppy yang mencari Desktop yang lebih menarik dan rentang Aplikasi yang lebih banyak untuk dipilih, tujuan sekarang dengan setiap rilis adalah untuk membuat Sistem Operasi yang menarik dan mudah digunakan untuk rata-rata Pengguna PC Rumahan. .” John Van Gaans, pencipta TEENpup Linux
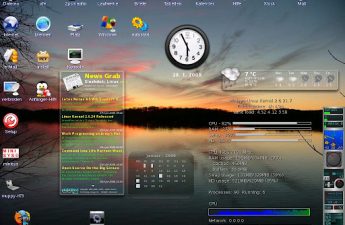
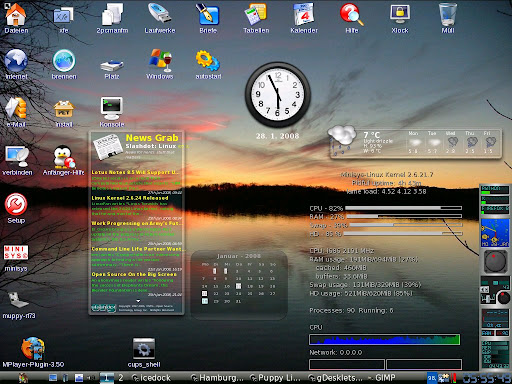
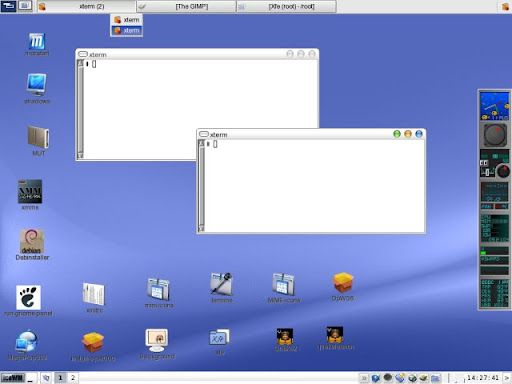
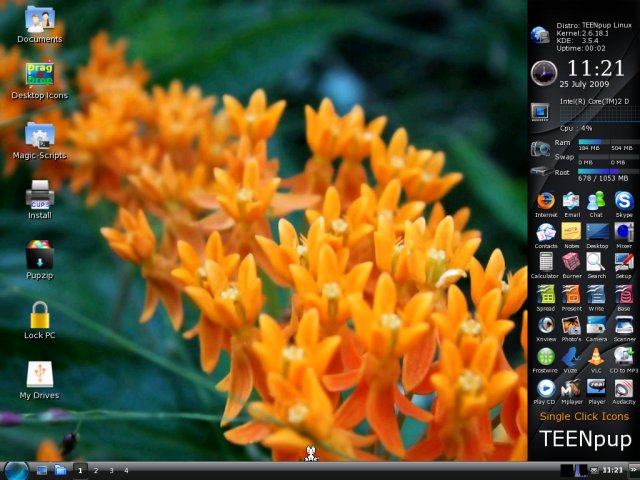
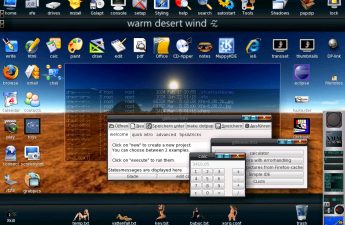
Hosting Gambar Gratis di www.ImageShack.us Hosting Gambar Gratis di www.ImageShack.us Hosting Gambar Gratis di www.ImageShack.us Tangkapan layar: 1. Desktop; 2. Beberapa aplikasi baru untuk TEENpup 2.14; 3. Aplikasi Multimedia
MENGAPA ANDA HARUS MENCOBA TEENpup 2008? Sebagai permulaan itu Gratis!! : -Peningkatan Terbesar adalah kemudahan penggunaan dibandingkan TEENpup 2.14 Cukup klik pada file media dan 95% dari waktu VLC Player akan membuka dan memutar file itu. Klik pada File PDF dan penampil Kpdf akan terbuka. Begitu pula dengan JPEG dll. Ini semua tentang membuat Sistem Operasi yang dapat digunakan oleh Pengguna non teknis setiap hari. -95% Windows Media yang didukung EG: Flash, Java, AVI, MP4, MP3, MPEG, WMA, QUICKTIME, REALMEDIA plus banyak lagi. -Tonton DVD Terenkripsi (Pada beberapa PC, Anda mungkin perlu menginstal TEENpup ke Hard Drive Anda.)http://murga-linux.com/puppy/viewtopic.php?t=27592∞ -Edit Banyak format media yang berbeda -Dukungan dialup untuk beberapa winmodem -Boot TEENpup dari Drive USB (Bawa Sistem Operasi Anda ke dalam Saku Anda!) -Jalankan TEENpup Live dari CD atau Instal ke Hard Drive Anda dalam waktu kurang dari 15 Menit -Berjalan dengan baik pada PC RAM pentium III 800Mhz 128MB lama, bahkan lebih baik pada PC saat ini -Bakar media favorit Anda ke CD/DVD, Unduh musik favorit Anda dengan Frostwire. -Transfer dan Lihat Foto favorit Anda dari Kamera Digital Anda. Jalankan Pertunjukan Slide. -Edit Film Keluarga Digital dengan “Lives” -Surf Net tanpa khawatir tentang virus, spyware, malware. -Tulis Surat, Spreadsheet, Publikasikan dokumen. -Menggambar dan Melukis dengan sejumlah besar Aplikasi yang menjadi standar pada CD -Dukungan Printer Sangat Bagus -Buka dan lihat Dokumen PDF, DjVu, Word, Excel dan Powerpoint plus lebih banyak lagi. -Jalankan 2 TEENpup 2008 PC dari satu Modem Broadband yang dirancang hanya untuk bekerja dengan satu PC.
TEENpup 2008 dibuat untuk Pengguna PC yang memiliki 1 atau 2 Komputer di rumah yang ingin melakukan hal-hal dasar yang sama dengan kebanyakan Pengguna Windows. Meskipun termasuk Aplikasi untuk memungkinkannya terhubung ke jaringan kantor, TEENpup lebih ditujukan untuk pengguna rumahan dan bukan Pengguna bisnis kecil dan belum diuji secara ekstensif di lingkungan bisnis. Keuntungan utama dari Windows dan beberapa Distro Linux yang lebih besar di luar sana adalah kecepatan. Setelah Anda terbiasa dengan TEENpup, Anda tidak akan tahan lagi
menunggu Aplikasi terbuka lagi seperti yang Anda lakukan di masa lalu.
Daftar 99% Aplikasi yang termasuk dalam TEENpup 2008
Mencari lebih banyak Aplikasi untuk digunakan di TEENpup 2008? Unduh dari sini http://dotpups.de/dotpups/∞ (Catatan: Meskipun sejumlah besar Aplikasi ini terdaftar akan berjalan dengan baik di TEENpup 2008, mereka awalnya dibuat untuk digunakan dengan Puppy Linux. Karena TEENpup 2008 memiliki versi yang lebih besar basis file sistem standar di atas Puppy Linux yang menjadi dasar TEENpup, menginstal beberapa aplikasi dapat menggantikan beberapa file sistem yang unik untuk TEENpup 2008 yang dapat menyebabkan masalah di kemudian hari. Saya sarankan Anda mencoba salah satu Aplikasi ini saat menjalankan TEENpup 2008 Live First! lihat apakah mereka berfungsi dengan benar sebelum menginstalnya jika Anda telah menginstal TEENpup 2008 ke Hard Drive Anda).…
PuppyLinux : Puplets – Halamannya adalah untuk turunan Puppy, Anda mungkin menginginkan versi resmi atau paket tambahan seperti MegaPup (2006) atau EZPup (2007). Untuk info terkini tentang turunan anak anjing, lihat forum Turunan Anak Anjing∞. Untuk gagasan tentang bagaimana setiap puplet berasal dari Puppy Linux, lihat Pohon Keluarga Puppy Darrelljon∞ di forum.
Boneka untuk platform x86
Nama Window Manager Deskripsi Ukuran Unduh Barebones FVWM Puppy 1.0.3 untuk koneksi lambat yang menggunakan browser dillo (tanpa Firefox, Opera atau Mozilla) dan terutama tidak menyertakan Abiword 40Mb HTTP Breeezy JWM oleh Raffy untuk ASUS Eee PC (juga tersedia sebagai live CD 80 MB untuk mesin lain) 65 Mb HTTP Deskripsi Pencerahan BuddaPup ?Mb HTTP DCL Xfce Versi terbaru, 2008 didasarkan pada Puppy 3.01 dengan Xfce terbaru, dimaksudkan untuk menggabungkan Xfce dan Puppy. 173 Mb HTTP Digipup JWM? Anjing untuk radio Ham. Juga dikenal sebagai EMCPup 97Mb HTTP Dragon Puppy Xfce Menggunakan Fatfree Puppy untuk membuat puplet berbasis Xfce yang stylish dengan Firefox, The GIMP, multimedia 108Mb HTTP EcoPup JWM? Beta dengan Firefox 2 dan OpenOffice 2 di-zip (untuk digunakan setelah diinstal) daripada yang dimuat sebelumnya 668Mb HTTP Metalink eBoxPup JWM? Alpha Puppy untuk eBox 2300 dengan Opera. 57Mb? HTTP EduPup JWM? Puppy 2.11 dengan perangkat lunak anak lain seperti: TuxType2, TuxMath, GcompriS (juga dengan suara Italia), SuperTux, dan TuxPaint (dengan tuxpaint-ConfiG dan TuxStamp). 166Mb? HTTP Empty Crust JWM Melucuti Puppy 45Mb FTP Hosting Gambar Gratis di www.ImageShack.useXpand Barbie JWM Puplet untuk wanita dengan Xfce, StumbleUpon, dan 60+ tautan ke game flash online termasuk Bubbles. 245Mb HTTP eXpand DOFUS JWM Puplet berbasis bermain MMORPG DOFUS. Termasuk banyak program lain juga untuk lingkungan web yang lengkap. Berdasarkan Puppy 2.14 dan dibuat oleh lvds. 263Mb HTTP Pengurangan JWM 2.17 Bebas Lemak untuk menambahkan hewan peliharaan Anda sendiri 51Mb HTTP Fire Hydrant JWM Firefox, flash, java, plus thunderbird, sunbird, dan lightning sehingga Anda bisa mendapatkan email dan kalender Anda dalam satu aplikasi. ditambah icewm, dan 19 tema, beberapa permainan baru di menu alat firefox, xmms dengan kulit sony, Limewire, shutterbug, Gimpshop, Yahoo messenger, aMSN messenger, dll banyak yang ditambahkan dan tidak ada skrip yang dihapus. 192Mb HTTP Torrent Flightpup JWM berdasarkan Fat Free dengan simulator penerbangan sumber terbuka FlightGear dan wNOP 288Mb HTTP Gamepup Xfce alpha 125Mb HTTP Metalink
How Puppy works – Halaman Barry tentang Cara Kerja Puppy works. http://www.puppyos.com/development/howpuppyworks.html
Catatan: beberapa di antaranya mungkin sudah usang, tetapi tautan Barry di atas seharusnya bagus.
quickstart 1 pager: PuppyInAnutshell
Satu hal yang perlu dipahami adalah bahwa Puppy itu unik. Barry membangun Puppy dari awal, file demi file, sehingga arsitekturnya tidak didasarkan pada distro lain.
Tata letak saat live-CD boot: vmlinuz, kernel Linux, dimuat ke dalam RAM, diikuti oleh image.gz, yang dimuat ke “ramdisk” cepat. File tersebut dikompresi “.gz”, sehingga tidak dikompresi ke dalam ramdisk dan kemudian ramdisk menjadi sistem file Puppy yang paling dasar, yaitu, ditunjuk “/” dan disebut direktori teratas atau root bersama dengan semua subdirektori /bin, /sbin , /lib, /dev, /tmp, dll.
Tujuan mendasar Puppy adalah bahwa semuanya harus dimuat ke dalam ramdisk, sehingga membebaskan drive CD sehingga Anda dapat menggunakan drive CD untuk tujuan lain. Juga, jika semuanya ada di RAM, startup aplikasi dan kecepatan berjalannya menakjubkan. Selain itu, komputer tanpa media pemintal (CD, hd) jauh lebih tangguh untuk digunakan di kapal, mobil offroad asf..
Saat listrik padam, isi RAMdisk hilang. Untuk mempertahankan pengaturan Anda, seperti perubahan konfigurasi, email, riwayat browser, asf Puppy selama bootup mencari partisi hard drive yang sesuai, dan jika ditemukan, buat file di dalamnya yang disebut “pup001”. Saya sewenang-wenang memilih “pupxxx” di mana “xxx” adalah tiga digit angka. Tiga digit angka juga tidak memiliki arti khusus, kecuali saat ini kami menggunakan pup001 untuk live-CD dan pup100 untuk instalasi USB Puppy.
pup001 adalah file tunggal (mudah dicadangkan), tetapi secara internal adalah sistem file ext2 yang lengkap. Setelah membuat file ini, Puppy memasangnya, dengan cara “perangkat loopback”, ke direktori /root. Direktori /root ini adalah direktori home Anda — semua barang pribadi Anda ada di sana. Jadi, saat Anda mematikan, semua akan tetap ada saat berikutnya Anda memulai Puppy.
Saya perlu menjelaskan langkah-langkah boot dengan benar — Puppy pertama-tama harus memasang partisi hard drive ke /mnt/home. Ini harus dilakukan sebelum Puppy bisa mendapatkan akses ke pup001 dan memasangnya di /root. Jadi Anda dapat melihat dua titik pemasangan dalam diagram. file usr_cram.fs
Sebagian besar file di Puppy, di distro Linux apa pun, ada di /usr – selanjutnya biasanya tidak perlu menulis apa pun di dalam /usr (yaitu, tidak perlu mengedit, membuat, atau menghapus file). Jadi seluruh konten /usr dikompresi sebagai satu file, bernama usr_cram.fs dan dipasang apa adanya di /usr, melalui “perangkat loopback” — teknik sebenarnya bukanlah masalah utama di sini, tetapi Anda perlu perlu diketahui bahwa semua /usr sebenarnya hanya satu file, berisi sistem file terkompresi dan hanya-baca. Memanfaatkan union-fs, bagaimanapun, perubahan /usr dapat dilakukan pada saat run-time sementara usr_cram.fs tetap tidak berubah.
bagian dari diagram dalam warna oranye untuk menggambarkan berbagai tempat di mana file usr_cram.fs mungkin berada. Keempat angka tersebut, 1, 2, 3, dan 4, adalah urutan pencarian dalam kasus booting dari CD:
Saat boot, Puppy pertama-tama akan melihat apakah ”usr_cram.fs”∞ ada di “/” di ramdisk (yang berarti awalnya ada di dalam image.gz) jika gagal, Puppy akan mencari di /root (yaitu, di dalam pup001) else di /mnt/home (di partisi hard drive) akhirnya Puppy akan mencari di CD (media paling lambat ini)
Bahkan jika Puppy jatuh ke opsi 4, ia akan melakukan yang terbaik untuk tidak meninggalkan usr_cram.fs di CD yang lambat. Kami benar-benar ingin menyalinnya ke ramdisk, atau gagal untuk pup001 di hard drive. Jika kita meninggalkannya di CD dan hanya memasangnya di /usr, Puppy akan berjalan lambat dan drive CD tidak akan tersedia untuk tujuan lain. Dengan RAM yang cukup usr_cram.fs menyalin ke “/” di ramdisk, lalu memasangnya di /usr.
Berapa banyak RAM yang “cukup”? Puppy paling bahagia di PC dengan setidaknya 128M RAM. 128M adalah ukuran yang baik — cukup untuk image.gz (tidak terkompresi) dan usr_cram.fs untuk keduanya berada di ramdisk.
Bagaimana jika PC Anda hanya memiliki 64M, 48M, atau bahkan hanya 32M RAM? Nah, usr_cram.fs tidak akan muat di ramdisk. Hanya angka taman bola, image.gz tidak terkompresi sekitar 10 juta, usr_cram.fs sekitar 50 juta.
Puppy memang memiliki kartu di lengan bajunya, jadi untuk berbicara – jika PC memiliki partisi swap Puppy akan secara otomatis menggunakannya, untuk meningkatkan ukuran virtual ramdisk. Jika Anda pernah menginstal distro Linux lain di PC, kemungkinan itu membuat partisi swap, jadi sudah ada di sana siap untuk digunakan Puppy. Jika PC Anda memiliki 128M RAM, Puppy akan mengalokasikan 62M untuk ramdisk, namun jika PC juga memiliki 250M (misalnya) partisi swap, maka ukuran efektif ramdisk menjadi 62+250 = 312M!
Namun, saya membuat keputusan dengan logika startup Puppy, hanya untuk menyalin usr_cram.fs ke ramdisk jika setidaknya ada 62M RAM fisik yang dialokasikan ke ramdisk. Jadi, untuk PC dengan RAM fisik kurang dari 128M, usr_cram.fs tidak akan pernah disalin ke ramdisk, meskipun ada partisi swap.
Masalah lainnya adalah urutan pencarian, keempat angka 1, 2, 3, dan 4. Saat Anda mem-boot Puppy dari CD, jika Anda menyalin usr_cram.fs dari CD atau /, ke /root (mis., di dalam pup001 ), itu akan menjadi tempat kedua yang dilihat Puppy saat berikutnya dia melakukan boot. Atau, salin ke “/” pada hard drive — itulah tempat ke-3 Puppy akan terlihat. Jadi, bahkan pada PC dengan hanya 32M RAM, Anda dapat melakukan boot dari live-CD dan membebaskan drive CD untuk tujuan lain.
PC dengan kurang dari 128M benar-benar membutuhkan partisi swap agar Puppy berfungsi dengan baik. Meskipun Puppy dapat boot dari live-CD pada PC dengan hanya 32M RAM, beberapa aplikasi adalah babi memori — Mozilla misalnya. Mozilla tidak dapat digunakan pada PC dengan RAM kurang dari 128M. Namun, seperti yang disebutkan di atas, partisi swap meningkatkan ukuran efektif ramdisk, sehingga Anda dapat membuat Mozilla bekerja di PC dengan RAM yang sangat kecil, meskipun lambat. Ini juga merupakan ide yang baik untuk menambahkan file swap, jika Anda memiliki beberapa ruang kosong di hard drive – dan tabel partisi Anda mengizinkannya.
Pikirkan tentang urutan pencarian itu sedikit lagi… #3 menarik. Puppy mencari usr_cram.fs di hard drive, tetapi bagaimana file itu sampai di sana? Anda mungkin meletakkannya di sana secara manual atau menjalankan skrip install-to-hard-drive-option-1.
Namun, ketika Anda mem-boot Puppy versi terbaru dari CD, Puppy akan menemukan usr_cram.fs yang lama! …tidak begitu baik. Atau, usr_cram.fs lama jika Anda meletakkannya di /root, dalam hal ini.
Untuk mengatasi masalah itu Puppy memiliki teknik untuk memeriksa apakah usr_cram.fs adalah versi yang benar. Puppy memeriksa ini, dan akan mengabaikan file usr_cram.fs yang ditemukannya memiliki nomor versi yang salah. Teknik yang digunakan adalah ketika usr_cram.fs dibuat, ukurannya, dalam byte, dicatat di /etc/sizeusrcram, yang kemudian dapat digunakan untuk memeriksa usr_cram.fs pada saat boot.
dengan puppy 1.0.1+ seringkali diinginkan untuk menerapkan kebijakan “semuanya di satu media”, tetapi Anda dapat membagi puppy untuk mengatasi batas ruang pada media tersebut (CD-RW atau stik USB).
Instalasi paket
Poin penting tentang arsitektur ini adalah /usr bersifat read-only. Setelah mengunduh paket .tar.gz “tarball” atau RPM, Anda tidak dapat menginstalnya ke Puppy karena sebagian besar paket ingin menginstal sebagian dirinya ke /usr.
Namun, versi 1.0.1 telah merevolusi manajemen paket di Puppy dengan menggunakan UNIONFS untuk membuat /usr baca-tulis. File apa pun yang ditulis ke /usr sebenarnya disimpan di /root/.usr, tetapi terlihat seolah-olah ada di /usr ke paket RPM dan semacamnya. Manajer paket dengan instalasi, penghapusan, dan pemeriksaan ketergantungan non-volatile bernama PupGet layak dilakukan!
PupGet menawarkan paket paket paket Puppy Unleashed. Semua paket ini tersedia untuk diunduh — dari menu Puppy pilih “Setup -> PupGet package manager”, dan ikuti langkah-langkah di GUI.
Semua paket Unleashed ada di Internet, dan PupGet dapat mengunduhnya satu per satu untuk menginstalnya, namun pengembang Linux dapat membuat live-CD mereka sendiri dari paket paket Unleashed yang lengkap. Live-CD yang Anda gunakan sekarang dibuat dari Puppy Unleashed.
Puppy Unleashed memungkinkan Anda untuk mengumpulkan CD boot Puppy kustom Anda sendiri dari ratusan pilihan paket (aplikasi). Untuk informasi lebih lanjut, lihat halaman Puppy Unleashed.
Booting dari USB
Teknologi flash
Flash drive 128M sangat cocok dengan Puppy. Pertimbangkan, Puppy hanya sekitar 50-60M, jadi akan muat di drive USB 128M yang menyisakan lebih dari 70M gratis untuk data pribadi. Ya, sistem operasi portabel lengkap dan data pribadi, semuanya dalam satu perangkat kecil tanpa suara yang tidak berputar!
Kelemahan dari teknologi Flash adalah jumlah siklus tulis yang terbatas. Setelah berkali-kali, tongkat itu akan runtuh. Saya telah melihat angka serendah 50.000 penulisan – lihat FlashDetail .
Bagaimanapun, kabar baiknya adalah Puppy dirancang khusus untuk tidak menulis ke Flash drive selama sesi, sangat memperpanjang masa pakainya. Perhatikan diagram ini:
gambar live usb
Saat Puppy melakukan booting dari USB, langkah-langkahnya hampir sama dengan live-CD. Kernel vmlinuz dimuat ke dalam RAM, image.gz tidak terkompresi dan dimuat ke dalam ramdisk.
Puppy kemudian mencari usr_cram.fs, pertama mencari di “/” di ramdisk, lalu di “/” di partisi USB. Kasus pertama hanya jika Puppy telah dibuat dengan usr_cram.fs di dalam image.gz, yang bukan situasi normal. Jadi kembali ke nomor 2. Puppy akan menemukan usr_cram.fs di partisi USB dan akan memasangnya di /usr.
Puppy akan mencoba optimasi. Jika ada cukup RAM, Puppy akan menyalin usr_cram.fs ke dalam ramdisk dan kemudian memasangnya di /usr. Ini membutuhkan sedikit waktu tetapi meningkatkan kecepatan lari. Namun, bahkan jika Puppy meninggalkan usr_cram.fs di drive USB dan memasangnya dari sana ke /usr, itu tidak menjadi masalah karena /usr bersifat read-only. Tidak akan ada penulisan ke /usr, sehingga masa pakai Flash drive tidak terganggu (Puppy versi 1.0.1 memiliki UNIONFS yang membuat /usr baca-tulis, tetapi semua penulisan sebenarnya masuk ke /root/.usr, yang ada di ramdisk, seperti yang dijelaskan di bawah).
Pertama kali Puppy melakukan booting dari USB, file pup100 belum ada — Puppy harus membuatnya. Puppy membuatnya, dan memasangnya langsung di /root – secara fisik di stick – melalui perangkat loopback. Sejauh ini, arsitekturnya pada dasarnya sama dengan live-CD.
Masa pakai perangkat Flash dikompromikan dengan menulis ke /root, yaitu ke pup100. Ini adalah direktori home Anda, dan aplikasi menyimpan semua jenis barang di dalamnya. Banyak tulisan akan terjadi pada /root. Kernel Linux melakukan cache penulisan, tetapi meskipun demikian, cache akan sering dihapus.
Perbedaan yang signifikan terjadi pada kali kedua Puppy di-boot dari USB. Jika ada cukup RAM (mengingat bahwa ramdisk juga dapat menggunakan partisi swap jika ada, sehingga ruang yang tersedia secara efektif adalah ukuran RAM ditambah ukuran partisi swap), maka Puppy akan me-mount pup100 ke direktori /mnt/pupxxx di untuk menyalin semua file dari /mnt/pupxxx ke /root.
Dengan demikian, salinan lengkap pup100 ada di /root, dan tidak ada penulisan yang akan terjadi pada pup100 fisik selama sesi. Saat shutdown, semua file di /root disalin kembali ke /mnt/pupxxx, sehingga memperbarui pup100. Kita dapat, secara teori, mencadangkan ke pup100 secara berkala, bukan hanya saat shutdown, tetapi itu tidak diterapkan dalam versi Puppy saat ini — sejujurnya, saya sangat jarang mengalami Puppy crash, dan satu-satunya situasi yang akan menyebabkan cadangan tidak terjadi akan menjadi kegagalan daya.
Puppy sangat cerdas, dan pengoptimalan yang dijelaskan di atas hanya diterapkan jika ada cukup RAM (+swap). Jika RAM tidak cukup, maka jelas pup100 tidak dapat disalin ke /root di ramdisk. Selama boot anjing memberi tahu Anda apakah ia berhasil memasukkan semua ke dalam RAM.
Untuk memberikan gambaran tentang apa yang “cukup” RAM, PC dengan 256M RAM cocok dengan 128M Flash drive. File pup100 akan berukuran sekitar 60 juta, dan ada cukup RAM untuk memuat semuanya ke dalam ramdisk. Di sisi lain, Flash drive 256M akan memiliki file pup100 180M yang akan terlalu besar. Dengan 256 flash-drive RAM 512MB yang baik untuk menyimpan semua dalam RAM. Jika PC memiliki partisi swap, Puppy akan secara otomatis menggunakan ini untuk meningkatkan ukuran maksimum efektif ramdisk. Apa pun situasi di PC Anda, Puppy akan mengerjakan konfigurasi terbaik, sepenuhnya otomatis.
Memperbarui, mengarsipkan, mengonfigurasi
Seperti yang Anda lihat, Puppy hanya terdiri dari 4 file. (sebenarnya, dimungkinkan untuk memiliki usr_cram.fs di dalam image.gz, mengurangi Puppy menjadi hanya 3 file — situs unduhan web mungkin memiliki konfigurasi tersebut. Akan lebih mudah untuk mem-boot jaringan untuk hanya memiliki dua file vmlinuz dan image.gz yang perlu dikhawatirkan)
Untuk memperbarui Puppy ke versi terbaru, Anda hanya perlu mendapatkan vmlinuz, image.gz, dan usr_cram.fs terbaru. Memperbarui sangat sederhana, tetapi dengan v0.9.8 saya membuatnya lebih sederhana dengan membuat opsi pembaruan ke dalam skrip instalasi. Yaitu, boot live-CD terbaru dan jalankan skrip install-to-USB, install-to-Zip atau install-to-hard-drive dan pilih “update” daripada “instalasi baru”.
Ini sangat sederhana, Anda bisa melakukannya secara manual jika Anda mau.…
Desktop – Nenek saya biasa memberi tahu saya bahwa terlepas dari apa yang kita lakukan, kita sering dihakimi adil atau tidak adil oleh perusahaan yang kita pertahankan (dia juga akan mengikuti saran itu dengan tegas, “jadi jangan bodoh!”). Tumbuh dewasa, nasihat itu tidak terlalu beresonansi dengan saya (tidak diragukan lagi karena kebodohan masa muda), tetapi seiring bertambahnya usia dan menyadari bahwa “hidup tidak selalu adil,” saya menyadari bahwa kata-katanya sebenarnya lebih merupakan kebenaran yang tak tergoyahkan daripada pepatah.
Maju cepat ke hari ini dan, sebagai CEO sebuah perusahaan kecil dengan impian yang sangat besar dan bahkan mungkin ambisi yang terlalu besar, saya dapat meyakinkan Anda bahwa kata-kata yang lebih benar tidak pernah diucapkan. Maksud saya, ketika membangun bisnis, sangat penting untuk menemukan mitra tepercaya yang dapat Anda andalkan dan dengan siapa Anda dapat tumbuh untuk mencapai visi Anda. Bermitra dengan orang lain – orang luar, pada dasarnya, apakah investor, kontraktor, atau perusahaan lain – harus selalu menghasilkan hubungan yang saling menguntungkan, tetapi pada akhirnya semua kemitraan didasarkan pada lompatan keyakinan, yang kebijaksanaannya akan akan ditentukan dari waktu ke waktu.
Kami mengambil lompatan seperti itu beberapa bulan yang lalu ketika kami memutuskan untuk bermitra dengan Sun Microsystems dan, dengan demikian, mengalihkan sistem operasi kami dari Linux ke Solaris (Desktoptwo dengan demikian digunakan dari tumpukan “SAMP” daripada tumpukan “LAMP”) . Kami melakukan ini karena berbagai alasan (beberapa di antaranya disebutkan dalam posting sebelumnya), tetapi cukup untuk mengatakan bahwa keputusan itu ternyata sangat bagus. Kami tidak hanya melihat peningkatan dramatis dalam ketersediaan layanan kami (Desktoptwo mencapai uptime 99,999% di bulan Desember dan Januari… dan sepertinya juga Februari – semoga saja), tetapi kami juga mendapat manfaat dari Sun kemurahan hati dan kesediaan untuk berbagi kabar baik dengan kami saat mereka mengejar masa depan cemerlang mereka sendiri (tidak ada permainan kata-kata yang dimaksudkan … ok, yah, mungkin dimaksudkan sedikit).
Contoh terbaru dari kemurahan hati ini datang minggu ini ketika Sun mengumumkan penyelesaian akuisisi MySQL-nya (daripada menjelaskan manfaat dari kesepakatan itu, ketahuilah bahwa kami pikir ada banyak!). Sebelum pengumuman, Sun bertanya kepada beberapa mitranya, bahkan yang baru dan relatif kecil seperti Sapotek, apa pendapat mereka tentang kesepakatan itu. Kami mengungkapkan pandangan kami yang sangat positif dan, sangat mengejutkan kami, kata-kata saya termasuk dalam siaran pers resmi dari Sun tentang penutupan kesepakatan. Memang, seperti yang Anda lihat dengan mengklik salah satu tautan di bawah ini (satu dari Sun.com dan lainnya dari situs MySQL), hanya dua orang yang dikutip dalam rilis tersebut adalah Jonathan Schwartz, CEO/Presiden Sun, dan, ya, milik Anda. sungguh-sungguh.…
IceWM – IceWM adalah pengelola jendela yang mengontrol tampilan, penempatan & manipulasi jendela. Tujuan dari IceWM adalah kecepatan, kesederhanaan, dan tidak menghalangi pengguna. Ini adalah manajer jendela ringan yang harus akrab bagi pengguna Windows. IceWM tampaknya bekerja dengan baik di Puppy, dan bermain baik dengan Rox-filer. Tampilannya dapat diubah dengan menggunakan tema yang berbeda.
Manajer jendela default di Puppy adalah JWM tetapi Anda dapat menggantinya dengan IceWM jika Anda mau.
Beberapa Tangkapan Layar IceWM-on-Puppy
Dapatkan IceWM Beberapa tampilan jendela yang berbeda mungkin menggunakan tema yang berbeda gambar EZpup Kebanyakan orang menambahkan IceWM ke Puppy melalui EZpup, file dotpet yang menambahkan IceWM, beberapa tema, beberapa utilitas, dll. Ezpup IceWM sebagai Dotpup Terpisah Unduh dengan mengklik tautan ini∞. (berasal dari sini∞) File lainnya Anda bisa mendapatkan file terkait IceWM lainnya (termasuk koleksi tema) dari halaman Dotpup.de untuk Manajer Jendela. http://dotpups.de/dotpups/WindowManagers/∞
Lihat juga Halaman wiki anak anjing tentang pengelola jendela Halaman beranda IceWM∞
Barang Icewm Pertukaran Tema IceWM Ada utas di forum Puppy di mana pengguna memposting tema IceWM untuk mengubah tampilan IceWM di Puppy mereka. Anda dapat mencoba tema-tema ini juga setelah Anda menginstal IceWM. Pertukaran Tema IceWM∞
IceWM Ultra : DotPup∞ Tangkapan layar∞ Utas Forum∞ 50 tema hebat dengan menu XDG Memerlukan getdir∞ dan sistem menu XDG∞
Koleksi Tema IceWM (19 tema): Tangkapan layar∞ DotPup∞
Tema FBX : DotPup∞ Tangkapan Layar∞ Utas Forum∞
Tema Gorila : Tangkapan Layar∞ DotPup∞ Utas Forum∞
Forum Thread dengan banyak tema IceWM (beberapa di antaranya ada di Koleksi Tema IceWM di atas)∞
InstallingPuppyOnNTFS – Halaman ini perlu diperbarui – info ini hanya relevan untuk seri 1.xx Puppy apa pun mulai 2.xx dapat menulis ke NTFS (hard drive XP)
Asumsi:
Windows 2000/XP pada partisi pertama dari disk IDE pertama (/dev/hda1)
NTFS digunakan untuk Windows
Apa yang harus dilakukan (semua langkah di Windows):
mengunduh file ISO Puppy 1.0.3
bakar live-CD atau gunakan UltraISO∞ untuk mengekstrak tiga file untuk file ISO usr_cram.fs ke C:\ vmlinuz dan image.gz ke C:\boot\
unduh pup001.zip dan unzip ke C:\
unduh WinGrub w32grub.zip∞ dan instal
salin dan tempel berikut ini ke dalam file C:\boot\grub\menu.lst
jalankan WinGrub GUI untuk menginstal GRUB, entri akan ditambahkan ke C:\boot.ini sebagai berikut, atau Anda dapat mengedit boot.ini secara manual
(contoh) [pemuat boot] batas waktu = 10 default=multi(0)disk(0)rdisk(0)partisi(1)\WINNT [sistem operasi] multi(0)disk(0)rdisk(0)partition(1)\WINNT=”Microsoft Windows 2000 Professional” /fastdetect C:\GRLDR=”Anak Anjing-1.0.3″
periksa semua file ada di tempatnya dan reboot, dan nikmati GRLDR, pup001 dan usr_cram.fs di C:\ vmlinuz dan image.gz di C:\boot\ menu.lst di C:\boot\grub\
tidak tahu cara memindahkan usr_cram.fs dari C:\ ke C:\boot\release, sehingga saya dapat menjalankan beberapa rilis Puppy. terutama 1.0.4 yang akan datang memiliki opsi untuk memiliki pup00 yang berbeda? file (saya kira saya bisa memodifikasi rc.sysinit dan membuat ulang CD/image.gz). Bagaimanapun, itu bagus untuk saat ini
Bisakah Anjing Peliharaan Anda Memakan Tomat? – Jika Anda tidak bisa mendapatkan cukup tomat dalam hidup Anda, Anda tidak sendirian. Menurut Departemen Pertanian Amerika Serikat, orang Amerika secara individu mengonsumsi lebih dari 22 pon tomat setiap tahun — dan, ya, sebagian besar ada dalam saus tomat dan saus tomat. Fakta yang tidak terlalu mengejutkan: Di mana ada makanan, di situ ada anjing Anda, dan Anda mungkin bertanya-tanya apakah Anda dapat berbagi kelezatannya dengan teman berkaki empat Anda.
Para ahli setuju bahwa meskipun anjing Anda dapat menikmati sedikit tomat sesekali, Anda mungkin ingin menjauhkannya dari kebun Anda, dan inilah alasannya.
Bahaya Tomat untuk Anjing Anda
Tomat adalah bagian dari keluarga sayuran nightshade. Tanaman ini, termasuk paprika, terong, dan kentang, mengandung unsur-unsur yang berpotensi beracun tetapi masih mengandung bagian yang dapat dimakan. Itu berarti meskipun buah tomat memang mengandung banyak manfaat kesehatan untuk anjing Anda dan dapat diberikan sebagai makanan sesekali, bagian tanaman lainnya bisa menjadi racun.
Tomatine adalah zat beracun yang ditemukan pada tanaman tomat dan terkait dengan solanine, zat beracun yang ditemukan di nightshades lainnya. Bila dikonsumsi dalam jumlah banyak, bisa menjadi racun bagi hewan peliharaan kita tercinta. Kabar baiknya: tomatine terkonsentrasi di bagian hijau tanaman, terutama bunga dan batang kecil. Jumlah kecil tomatine yang ada dalam tomat matang dianggap aman untuk anjing. Tomat hijau memiliki lebih banyak tomatine, tetapi perbedaannya mungkin tidak berarti.
Efek Konsumsi Tomatine pada Anjing
Gejala keracunan tomat yang paling umum adalah gangguan pencernaan, seperti diare atau muntah, tetapi jika anjing memakan tanaman tomat dalam jumlah besar, mereka juga dapat menunjukkan gejala, seperti depresi, kelemahan otot, hipersalivasi, pupil melebar, atau kelainan bentuk. detak jantung—dan Anda perlu mencari perawatan segera dari dokter hewan hewan peliharaan Anda.
Sama seperti pada manusia, tomat juga dapat memperburuk masalah pencernaan tertentu, seperti refluks asam, jadi selalu ada baiknya untuk berkonsultasi dengan dokter hewan sebelum menawarkan tomat untuk anjing Anda. Tomat juga merupakan alergen yang umum pada manusia, dan meskipun jarang, anjing Anda dapat memiliki reaksi serupa.
Bagaimana Dengan Kecap, Saus Tomat, dan Produk Berbahan Dasar Tomat Lainnya?
Jika anjing Anda suka mengunyah tomat segar, ingatlah bahwa dia mungkin juga tertarik pada potongan pizza atau spageti yang Anda makan. Saus tomat, saus tomat, sup, atau jus tidak terlalu sehat untuk anjing karena tambahan garam dan gula, serta rasa buatan atau bahan kimia lain yang mungkin dikandungnya. Namun, sejumlah kecil produk berbahan dasar tomat seperti saus kemungkinan tidak akan membahayakan anjing Anda.
Manfaat Memberi Makan Tomat Anjing Anda
Ketika ditawarkan kepada hewan peliharaan Anda dalam jumlah kecil, tomat memberikan beberapa manfaat kesehatan. Tomat penuh dengan nutrisi, termasuk karotenoid likopen dan beta-karoten, yang merupakan antioksidan kuat yang dapat membantu mencegah kerusakan sel. Buah rendah kalori juga tinggi serat, yang membantu pencernaan, dan tomat kaya akan vitamin A dan C untuk membantu meningkatkan penglihatan hewan peliharaan Anda dan mempromosikan kulit yang lebih sehat.
Cara Melayani Tomat Anjing Anda
Saat menawarkan tomat anjing Anda, Anda pasti ingin mencari tomat merah yang matang, matang, (tomat ceri dan varietas lain juga baik-baik saja) yang semua batang, daun, dan sulurnya benar-benar dihilangkan. Meskipun banyak orang lebih menyukai tomat yang diasinkan, jenis aditif ini dapat berbahaya bagi anjing Anda, jadi potongan kecil tomat yang dicuci bersih selalu merupakan cara paling aman untuk menyajikannya kepada hewan peliharaan Anda.
Mulailah dengan menawarkan hanya satu atau dua gigitan dan lihat bagaimana reaksi anjing Anda. Jika dia menikmati tomat dan tidak mengalami efek samping, jangan ragu untuk terus menawarkan jumlah kecil sebagai hadiah.…